
SSH in a nutshell
SSH
Definition
Straight from the man pages:
SSH (SSH client) is a program for logging into a remote machine and for executing commands on a remote machine. It is intended to provide secure encrypted communications between two untrusted hosts over an insecure network. X11 connections, arbitrary TCP ports and UNIX-domain sockets can also be forwarded over the secure channel.
Setup (Old School Method)
On a new machine we need to setup up ssh. This includes installation if its not installed by default (i.e. Arch Linux). It also includes the creation of our private and public keys (maybe write a post about the basics of pgp).
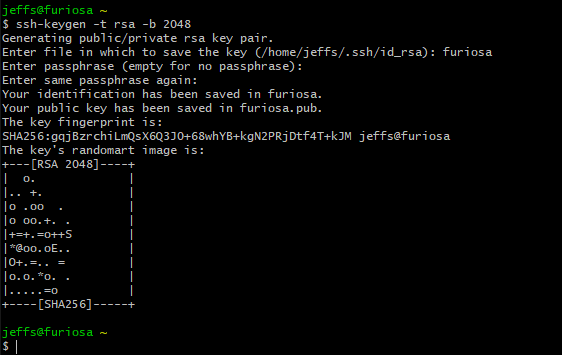
To create a new key we use ssh-keygen. Taken straight
from the man pages:
- ssh-keygen generates, manages and converts authentication keys for ssh. It can create keys for use by SSH protocols versions one and two. Protocol one is depreciated and should not be used.
When creating a key we need to specify the type. To do this we use the
-t flag followed by one of the following specifications:
- RSA, DSA, ECDSA, ED25519
If no flag is present it will default to RSA which is what we want.
Also important is the number of bits in the key to generate. By default
it will generate a key length of 2048 bits. In this article we will not
discuss non-RSA configurations which require different lengths (refer to
the man pages for more info). Generally it is recommended to use 4096
bits of entropy, to do that we use the -b followed by the
number, in this case 4096.
Running ssh-keygen -t rsa -b 4096 will create the ssh
key.
It will ask for a password, this is up to the user but it does not limit your ability to login without entering password as we discuss below. It does however, offer protection should your device be stolen or compromised. The password can be bruteforced but it will give you time to manually for to your administered servers and delete the public key that matches the now stolen private key.
Key Based Authentication
Key based authentication allows seamless interaction between disparate hosts over the network. Generally, to ssh into a remote server the client will need to enter the servers password. Using ssh keys (unless they too are configured with a password) negates this.
Below we see how to transfer the clients public key to the remote server.
scp ~/.ssh/id_rsa.pub user@remote.server.org:/home/user/.ssh/clients_public_key.pub
scp is the Secure Copy program. It uses ssh for the data
transfer and provides the same security. The basic syntax is to call
scp then append the file to be copied, followed by the
destination to send it to. The destination is punctuated by a colon
: coupled with the location on the remote server in which
the file should be saved to (as seen above).
Next we need to authorize the key we have sent to the remote server. If we do not authorize it, it will not allow us to login using the key, i.e. we will be prompted for a password each time. To do that we can input the following:
cat ~/.ssh/name_of_new_key.pub >> ~/.ssh/authorized_keys
Firstly, in linux we do not need to append a file name at the end so
this works as expected. And secondly, the >> will create
the file for us if it does not already exist.
Finally, it is important to set permissions on the new directory and its keys. Permissions is another topic, but we want the following:
chmod 700 /home/user
chmod 700 /home/user/.ssh
chmod 600 /home/user/.ssh/authorized_keys
We want our /home and /home/.ssh to have
read, write and execute only by the user and
../authorized_keys only read and writable by the user.
This is on the remote server. We can also now delete the public key from
within ~/.ssh/ as it is saved to the authorized keys
although this is optional.
Setup V2 (New School)
After explaining the old way or more traditional (sometimes better) way
we turn to ssh-copy-id.
To do all of that in one command we can just enter:
ssh-copy-id user@remote_server
And, it will do everything in about 2 seconds (after you authenticate
with the remotes password). To test it without committing anything use
the -n flag (dry run). It is important to know what is
happening in the background though, so do the old school method to get a
better feel for linux – if you are old hat, just use this.
Further Security Measures
Disable Password Authentication
After we have setup key based authentication on the remote server we may want to close off all non-key authenticated access via ssh. This means that only those with authorized keys will be able to access the server. In a home network this may be overkill (dependent on the situation or security posture/threat model you need, or face) but if you are using ssh to administer a VPS this should be the minimum standard.
To do this we need to edit our /etc/ssh/sshd_config
back it up first!.
To do this we just change PasswordAuthentication to
no inside the file. After the change we need to restart
the ssh daemon to make the change immediate.
Change SSH Default Port
Many of the automated botnets automatically search the web looking for open ports, and exploiting them by entering common default credentials. Whilst changing the ssh port from 22 to something else is security by obscurity it does enough to make elevate you above the ’low hanging fruit’ category.
To alter the default port the sshd_config needs to be
edited.
#Port 22 <---- Uncomment this and change port
#AddressFamily any
#ListenAddress 0.0.0.0
#ListenAddress ::
You need to be root to do this. And the ssh daemon must be restarted.
systemctl restart sshd.service on systemd.
Auto Deny/Fail2Ban
To access a host via ssh it needs to be open over the network. This is adds risk and creates an attack vector. fail2ban is a service that attempts to mitigate this by altering your firewalls configuration after a set number of unsuccessful login attempts.
Port Knocking
A method to surreptitiously open the port to ssh. By making connection attempts (“knocking”) on ports in a predefined manner the firewall allows access to ssh. Again, this is security through obscurity but coupled with several strategies does help to harden the system. Nmap can ascertain if a host has port knocking enabled.
Keep up to date with my stuff
Subscribe to get new posts and retrospectives